Bug Out Bag / Emergency / Feel / Health / How To... / Medical Kit / Mind Preparedness / Preparedness / Prepper / Prepper Skills / Survival Medicine / Survival Plan
How To Stop Excessive Bleeding In A Survival Situation
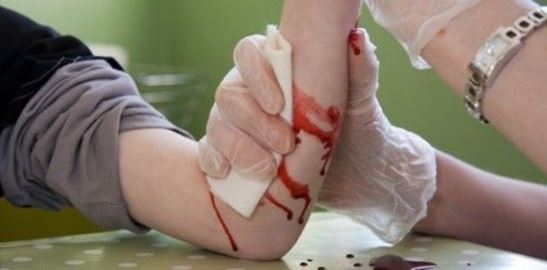
Even though you might plan things in advance, the outcome of a situation can change unexpectedly. You might find yourself in need of medical assistance and have no professional products at your disposal. This is where you’ll need to improvise and fast. Open wounds and cuts are some of the most common injuries that usually occur.