Category: Bug Out Bag

46 Must-Have Items For Your Emergency Vehicle Kit

As much as I like to think I have a handle on things, sometimes projects slip through the cracks. Case in point: Since the big road trip to Arizona in late September, not once have I gone out to the Subaru and reviewed the contents of my car kit. At the time of my journey, I was certain that I had everything I needed in the event of a calamity along the way. The journey, after all, was close to 1,500 miles.

Since then, life has happened. We needed room to cart groceries and, in Shelly’s case, to transport 4 set of golf clubs along with 3 of his buddies. Something had to give, but what?

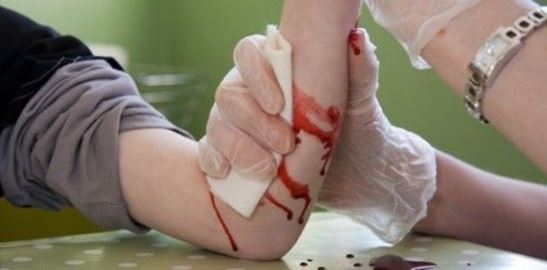
Today’s challenge is to take inventory of your emergency vehicle kit and supplies. To get you started, here is a car kit submitted by a long-term reader, Elaine K. I think it is a good one and am going back to check my own supplies to make sure that I am as prepared as she is.

Best Practices: 46 Items To Include In Your Vehicle Emergency Kit

1. Tow chains

2. Jumper cables

3. Spare tire

4. Tire jack

5. Fix-a-flat (I like this brand)

6. Fire extinguisher

7. Gasoline funnel

8. Candles

9. Flashlight

10. Cigarette lighters

11. Matches

12. Flares

13. Duct tape

14. Disposable gloves

15. Well-stocked first aid kit (here is one I put together myself)

16. Well-stocked tool kit

17. Solar blankets

18. Wool blankets

19. Warm socks

20. Rain coat

21. Cash (bills and coins)

22. Winter hat

23. Heavy gloves

24. Heavy sleeping bag for winter, lighter sleeping bag for summer

25. Paper

26. Pen

27. Whistle

28. List of important phone numbers

29. Can opener

30. Knife

31. Map

32. Garbage bags in various sizes

33. Paracord or rope

34. Quart of oil

35. Sewing kit

36. Baby wipes

37. Toilet paper

38. Hand soap

39. Comb

40. Hair brush

41. Tooth brush

42. Change of clothes

43. Various towels in Ziploc bags (women can use to urinate in if caught in traffic)

44. Water

45. Water filter such as the Survivor Filter Pro

46. Edible nuts stored in raw honey

I don’t know about you, but I got some good ideas from this list. And shame on me; for all of my foresight, I did not have a fire extinguisher in my car. Thanks, Elaine, for your valuable contribution to Backdoor Survival and to our preps!

Source: backdoorsurvival.com

How To Stop Excessive Bleeding In A Survival Situation

Everybody who has been following my writings or has some clue about who I am and what I “preach”, will have an idea of how much I advocate safety before anything else. I’ve talked many times before about the importance of having the right stuff and a personalized medical kit for and emergency situations, be it for TEOTWAWKI or simply for everyday life situations. But even though you might plan things in advance, the outcome of a situation can change unexpectedly. You might find yourself in need of medical assistance and have no professional products at your disposal. This is where you’ll need to improvise and fast. Open wounds and cuts are some of the most common injuries that usually occur. Find out how to stop excessive bleeding because will be imperative to reduce health risks as much as possible. Luckily there are plenty of methods to reduce hemorrhaging that don’t require special bandages and other products that are usually found in a professional medical kit. Here are some of the best methods to get the job done.

Applying Direct Pressure On The Wound

Stopping the heavy blood flow by applying a piece of cloth (or pretty much anything else that can stop the blood flow) directly on the gush will be your first instinct. And you wouldn’t be wrong. Any type of cloth or cloth-like material will do. In some cases, if the situation is desperate enough, you can even apply direct pressure with your hand. Using a sterile cloth would be preferable sure, but in life-threatening scenario pathogens are the least of your worries. Infections are risk factor beyond the shadow of a doubt, but it will take some time (days, even weeks) to set in and become a real problem. But blood drains really fast, especially if the wound is deep enough. You can die in a matter of minutes, considering the average adult male has a volemy (total blood volume) of about 5l, while the average female has 4,5l. So if SHTF, stopping the blood loss is top on the priority list.

Using Pressure Points

If applying direct pressure on the open wound fails and the blood loss can’t be stopped, you’ll need to take the technique a step further and resort to applying pressure on the nearest artery. The key is to press the artery against the bone in order to reduce blood flow; the main idea is to compress the artery that correlates the heart with the open wound. If you do the technique right, the blood transported from the heart to the affected area will be stopped in its tracks, hence the bleeding will cease. There are many pressure points on the human body for stopping massive hemorrhaging but the main two are the brachial artery (the primary pressure points for the arms) and the femoral artery (the primary pressure point for the arms). The brachial artery is placed a few inches below the armpit area, on the inside of the upper arm, somewhere in between the biceps and triceps muscles. Feel for the pulse; once you’ve got it, apply pressure with 3 fingers. The femoral artery is located on the inside of the thigh, in the groin area; it’s pretty deep in, so you’ll need to use a bit of force to actually apply enough pressure to stop the bleeding. Once the bleeding has stopped, do not apply pressure on the artery for longer than 3 – 5 minutes.

Applying A Tourniquet

This method is probably the most efficient method in stopping heavy blood flow, but it should be used as a last resort only, as it can cause irreparable damage. It reduces the blood loss entirely, but it also prevents the oxygenation of the affected area and of all the living tissue below the pressure point. This could cause permanent damage or even the loss of the limb in question, so apply the tourniquet only if there is no other option available. You can improvise a tourniquet out of pretty much everything, whether it’s a belt, a hose or a folded piece of cloth (never wires or thin ropes). The contraption should be placed between the heart and the open wound, more precisely a few inches above the gush. Just make a simple knot, push a stick through it and tighten firmly by twisting. Loosen the tourniquet every 20 minutes to check if the bleeding stops. Once the hemorrhaging stops, apply direct pressure on the wound and ice packs (if available).

Astringent Plants

Once again, Mother Nature comes to save the day. If you find yourself in a desperate situation, you’ll be glad to know there are plenty of plants you can grow (and find) that will do wonders for excessive and periodical bleeding. Once you’ve treated an open wound, you can always use prepare a mixture of concoction to fix the problem from “the inside” as well. Here are some of the most important and easy to use plant

Cayenne Pepper (Capsicum minimum) – this pepper is recommended for external use; dry them up and grind them in a thin powder, that you can use on open wounds to stop the bleeding

Plantain (Plantago sp.) – it’s mostly used against superficial cuts; you can use the leaves to make salves, juices or even tea

Yarrow (Achillea millefolium) – it’s an excellent astringent and aids blood clotting; you can make a tea from both leaves and flower heads (fresh or dry)

Witch Hazel (Hamamelis virginiana) – as far as internal use goes, the witch hazel can be brewed into a tea that does wonders for internal bleeding, especially for the stomach and bowels

You should be very vigilant when treating a deep open wound. It’s preferable to have a professional medical kit at your disposal, but if for some reason or another you won’t, at least you know the alternatives. Respect these techniques, and if there’s ever the need for it, you’ll save lives.

By My Family Survival Plan

Three Best Binoculars For Survival Purposes

Three Best Binoculars For Survival Purposes

Owning a pair of binoculars for survival in a TEOTWAWKI scenario is not only meant to make every day life easier for you, but it could also save your life. Most binoculars are very precise and will let you spot from afar all sorts of dangers that might be coming your way, leaving you with enough time to react. It could also be used for hunting (spotting wild game), guarding your property or simply scouting new territory. So no matter the scenario, binoculars would be always welcome.

A good pair of binoculars (and a bit more expensive one) will work fine even in low light or moonlight. There are plenty of companies on the market that have specialized in making quality products and are well-known for it, like Olympus, Pentax, Steiner, Brunton, Carson, Zeiss, Leica, Nikon and more. Sadly, there are plenty of counterfeit products (coming mostly from China) that cost far less but are worth less than the plastic they’re made up from, so stay away from such devices and anything that seems “too good to be true”; any high-end or designer brand selling through unusual channels at a fraction of the normal price should be viewed with a healthy suspicion.

To fully understand the importance of such a device we must comprehend what it is and how it works. There various types of binoculars for survival on the market and they come in a great variation of shape and size, but in principle, they are all the same: they’re comprised of two telescopes that are linked together by an adjustable mechanism. The most important factor you have to consider when buying your own binoculars is a sequence similar to, for example, 9×35. These numbers are giving you a lot of information on the capacity of the product, as the number before X (9 in this case) is the magnification factor. A 9X binoculars mean that the image will appear to be 9 times closer than it actually is. The number following X (35 in our case) is a specification of the front lens, which is responsible for the light intake capacity.

The greater the light intake capacity, the clearer the image is going to be. So the bigger the number following X is, the more suited the binocular will be for lower light conditions. The RBI (the relative brightness index) is responsible for image brightness. It’s determined by a simple mathematical equation. First, we need to figure out the exit pupil in our case, for the 9X35 mode, we used as an example. The exit pupil is 35 / 9 = 4 (roughly). The RBI is the square of the exit pupil: 4 x 4 = 16. It’s commonly known that the best binoculars for low lighting conditions are those that hold an RBI bigger than 25, so our example wouldn’t do so well outside proper lighting conditions.

Lens coatings are responsible for light transmission; their purposes is to prevent hazardous light reflection and to deliver a clear and focused image. There’s single coating, or a single layer of anti-reflective coating (Coated), the whole lens to lens surface is coated (Fully Coated), some surfaces have multiple layers of coating (Multi-Coated) and last but not least, all surfaces are covered in multiple anti-reflective coating layers (Fully Multi-Coated). Now that we covered the basics, let’s see some of the best binoculars for a survival scenario.

The Olympus Outback 10×21 RC 1

This particular model by Olympus is one of the best binoculars you can find if you consider the quality / price ratio. It’s only about $69, and it’s not much if you consider its capabilities. Its field performance is simply outstanding, as it can produce superior images to those of binoculars that are twice as big or pricy. It has great sharpness and definition thanks to its high-quality roof prism, which is made out of a very high-quality optical glass. But like most 10x devices, it requires a steady hand for maximum efficiency, because it also magnifies movement.

Carson Raven RV-826

The Raven RV-826 is real bargain and possibly the best deal for budget preppers. It’s an 8×26 binocular that despite its tiny size, (4.5 x 4.25 inches and 10oz) it delivers quite a clear and steady image. It’s perfect for hikers who simply want to observe their distant surrounding or for people that are out nature watching. It will allow a steady and focused image without making your presence known to the animals you’re watching. These tiny binoculars are really tough and resistant; they come with a waterproof housing that is just impenetrable. And as a bonus, you also get a microfiber cloth for lens cleaning. If the Raven RV-826 is the right tool for you, know that it’s no more expensive than $79.

The Brunton Eterna Compact 10×25

The Eterna Compact 10×25 by Brunto is worth mentioning because of its image clarity and focus despite its tiny frame. Despite its small carcass, it’s pretty heavy, weighing in at 1lb 1oz. The excessive weight seems to justify if you consider the toughness of the Eterna Compact 10×25. It has neoprene lens covers that are easily removed (even if you’re wearing gloves), it has a padded neck strap and a very efficient and functional focusing dial. What sets it apart from regular, cheaper binoculars is the adjustable diopter setting for each eye that allows precision focusing for maximum clarity. It’s not a cheap device (it costs about $360), but it’s precise, well built and durable.

There are many options, and the prices vary from tens to hundreds of dollars. What you ultimately buy is entirely up to you. Just know that for survival purposes you don’t need the latest and greatest, so you don’t have to necessarily spend a lot of money. You can find good binoculars even on a tight budget that, if need be, we’ll undoubtedly provide you with an advantage in a SHTF scenario.