Posts tagged: planning

46 Must-Have Items For Your Emergency Vehicle Kit

As much as I like to think I have a handle on things, sometimes projects slip through the cracks. Case in point: Since the big road trip to Arizona in late September, not once have I gone out to the Subaru and reviewed the contents of my car kit. At the time of my journey, I was certain that I had everything I needed in the event of a calamity along the way. The journey, after all, was close to 1,500 miles.

Since then, life has happened. We needed room to cart groceries and, in Shelly’s case, to transport 4 set of golf clubs along with 3 of his buddies. Something had to give, but what?

Today’s challenge is to take inventory of your emergency vehicle kit and supplies. To get you started, here is a car kit submitted by a long-term reader, Elaine K. I think it is a good one and am going back to check my own supplies to make sure that I am as prepared as she is.

Best Practices: 46 Items To Include In Your Vehicle Emergency Kit

1. Tow chains

2. Jumper cables

3. Spare tire

4. Tire jack

5. Fix-a-flat (I like this brand)

6. Fire extinguisher

7. Gasoline funnel

8. Candles

9. Flashlight

10. Cigarette lighters

11. Matches

12. Flares

13. Duct tape

14. Disposable gloves

15. Well-stocked first aid kit (here is one I put together myself)

16. Well-stocked tool kit

17. Solar blankets

18. Wool blankets

19. Warm socks

20. Rain coat

21. Cash (bills and coins)

22. Winter hat

23. Heavy gloves

24. Heavy sleeping bag for winter, lighter sleeping bag for summer

25. Paper

26. Pen

27. Whistle

28. List of important phone numbers

29. Can opener

30. Knife

31. Map

32. Garbage bags in various sizes

33. Paracord or rope

34. Quart of oil

35. Sewing kit

36. Baby wipes

37. Toilet paper

38. Hand soap

39. Comb

40. Hair brush

41. Tooth brush

42. Change of clothes

43. Various towels in Ziploc bags (women can use to urinate in if caught in traffic)

44. Water

45. Water filter such as the Survivor Filter Pro

46. Edible nuts stored in raw honey

I don’t know about you, but I got some good ideas from this list. And shame on me; for all of my foresight, I did not have a fire extinguisher in my car. Thanks, Elaine, for your valuable contribution to Backdoor Survival and to our preps!

Source: backdoorsurvival.com

How You Can Use Drones In A TEOTWAWKI Scenario

How You Can Use Drones In A TEOTWAWKI Scenario

Drones have been widely available on the market lately and they come in all sorts of shapes, sizes and colors. Many people look at drones and see an over-the-top expensive toy. I, on the other hand, as a prepper, see opportunity. And with good reason. Drones are remote-controlled gadgets, with enough battery autonomy that have cameras attached. No special skills are required to handle your very own drone and you can even pair with your smartphone. You can use drones in a TEOTWAWKI scenario to gather intelligence in your surroundings without being physically present in a possibly hostile territory. Reconnaissance missions will no longer require special preparations, other than that of flying a drone that has a camera attached. The cameras can take high quality pictures and even videos with sound. If you’re smart phone allows it, it can even emit in real time. Many drones have a built-in GPS software that helps them return safely to their launch point, in case radio contact is lost. However, in a survival scenario, the GPS service might not be available, so keep that in mind before taking off.

What You Need To Know About Drones

First and foremost they are battery operated. So if you plan on using the drones even when everything falls to bits, you’ll need to ensure you have a recharging station, based on fuel, or even better, solar panels. They are computer and smartphone friendly, which means they have USB ports that allows you to connect your drone to your computer, for easy access and settings; you can even follow the flight path in real time from your smartphone and even adjust camera angles. The flight speed varies from model to model. The average drone flies at about 25 mph, but the more expensive model can reach staggering speeds of even 80 mph. Autonomy and control distance is also variables from one model to the next, but an average fully charged battery gets depleted in about 10 – 30 minutes. There are also gas-powered drones available on the market, their autonomy is superior to the battery operated ones, but they’re also more expensive. A drone can serve many purposes in SHTF situation: scouting and surveillance flights, scouting for wild game and even delivering messages from A to B. On the downside, drones are very visible and can attract unwanted attention. They can be taken down easily or even worse, followed to give away your location. So you’ll need a bit of practice before using it in a critical situation and A LOT of caution.

Some Of The Best Drones That You Can Buy

The Dromida Ominus FPV is one of the cheapest drones on the market, which is perfect for flight practice. The camera quality is rather good and it has great connectivity to your mobile device. It’s easy to use, has decent autonomy and it can be very fun to fly. For those of you that are looking for a device to get you started in the drone area, look no further. The Dromida Ominus FPV is a resilient little gadget, comes in many colors you can choose from (blue, green red, yellow), is both iOS and Andriod compatible (so you won’t have to change your phone) and costs only $150. If you’re interested in purchasing it, go here.

The Parrot Bebop drone is possibly the most renowned of the Parrot company and it is a semi-pro drone, meaning it’s considered to sit in between toys and professional drones. The drone itself is very lite and incredibly maneuverable, making it easy to fly even in closed spaces or indoors. It supports smartphone and tablet connectivity and it comes with two batteries. The battery, if fully charged, should last about 10 – 15 minutes of continuous flight. The onboard camera is decent; it has a resolution of 1080p. The base model comes at about $450, but if you’re willing to spend more you can get the model with the range extension, that will allow it to fly further. For more details, go here.

The Yuneec Q500 4K is drone whose popularity is growing steadily amongst the drone enthusiasts thanks to its camera quality. The built-in camera has a 4K resolution (4000p), meaning the image quality it offers for both pictures and video is unbeatable. It comes with two batteries and the camera is removable. There’s also a version that comes with a 1080p camera, but the $k version is of course far superior. The controller has an android built into it, so you don’t necessarily have to use your phone or tablet for maneuvering the drone. The model doesn’t have many gadgets and accessories available yet, but it won’t be long before Yuneec releases a bunch, considering how fast this little drone is gaining in popularity.

Getting your very own drone is nowhere near a bad idea. Flying one can be really fun and addictive, so if you’re lacking a serious hobby, drone flying could just fill that void. Enjoy it and practice, you’ll never know when your drone piloting skills will save your neck in a SHTF scenario.

By My Family Survival Plan

How To Improvise A Fishing Rod

How To Improvise A Fishing Rod
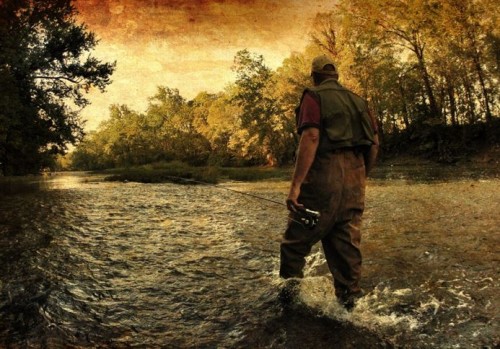
How To Improvise A Fishing Rod. Photo – Pexels (PD)

Every serious fisherman knows the importance of owning the right fishing rod. Whether you’re fishing for sport or you’re simply trying to feed yourself, there’s no better way than doing it the old-fashioned way. But in an SHTF situation (whether you’re lost in the wilderness or you’ve found yourself trapped in an end-of-days scenario) you might not have you trusted fishing rod on you. But you won’t necessarily need to. You’ll need nothing more than a knife; having a small tackle box with the right assortment of hooks and some spool of monofilament will make things easier. If you’re lucky enough to have these items on you, you’ll need to improvise the fishing pole only, which it’ll be more than enough to feed yourself in desperate times. If not, well, you’ll need to improvise the whole thing. The rest of the materials you can easily find in your surroundings. And here’s how to do it.

The Pole

The first thing you’ll need to find is the pole; any 6 – 7 foot-long branch will do, as long as it’s no thicker than a human thumb. Once you’ve found the right one, you’ll have to break it off from the tree. Once this is achieved, you’ll need to break it again to the desired length. If it’s dry enough, you can snap it in half against your knee or against any hard surface; but if it’s not dry and it’s still rather flexible, you can try cutting it with the knife. Using dead branches is a bad idea because their durability is very low and break easily. You can test the tip by banding it to the point of snapping. If it snaps, fine; the more it does snap, the stronger the remaining pole gets. As soon as you got the pole to the desired length, use the knife to remove any remaining branches, leaves or shoots. Make it as smooth as possible in order to improve weight and handling.

The Fishing Line

If you happen to have some monofilament fishing like on you, your job gets much easier. If you don’t, sewing thread could get the job done as well. But in sewing thread isn’t an option either, you’ll need to get your hands dirty and look for thin green vines in ground cover or in the undergrowth found around various bushes. The greener the vine, the stronger it will be. If you find a vine that’s about 10 feet, look no further. Remove any tendrils by pulling carefully so you don’t damage the line. For safety, the line should be tied midway down the pole and wrapped as many times as possible towards the tip, where a simple overhand knot will suffice for holding it in place. This way, if the pole breaks, you can immediately catch the line with your hands.

The Hooks And The Bait

Some professional hooks will work extremely well, provided of course you brought some along. If not, you can always use paper clips, safety pins or soda can tabs. Another viable option is to carve your very own V-shaped hooks out of wood (green wood preferably). At one end you’ll need to carve a groove, in the hook-eye area. This will allow you to tie the fishing line onto. As bait you can use pretty much any insect you can get your hands on. The easiest things to get are the earthworms, which can be found underground, under rocks, around moss, and in other moist areas. Once you’ve baited the hook, you’re pretty much ready to go. From here on in it’s all about patience and skill.

When it comes to fishing is a SHTF / TEOTWAWKI situation, fishing areas are very important. It’s absolutely necessary to procure the maximum amount of fish with as little resources as possible. So it’s not all about the gear that you have or that you’ve crafted. It’s just as important to know where, when and how to fish. If you’re fishing in stagnant waters, you’ll need to go after still pools. The stillness of the water will make the bait as visible as possible, thus increasing your chances of catching something fast. When it comes to running waters, the area behind exposed boulders would be the best location to catch anything, as fish have a tendency of gathering in such places. You might also want to consider bank fishing, as standing on the water’s edge can also be a very productive fishing method.

As you can see, improvising the entire fishing pole is a rather difficult task, but not impossible to achieve. As previously stated, having line and hooks on you will spare you a lot of trouble. But if not, you’ll just need to put some extra effort into it. Just follow all the steps and you’ll have your DIY fishing rod in no time.

By My Family Survival Plan

Image For Pinterest:

How To Improvise A Fishing Rod
How To Improvise A Fishing Rod. Photo – Pexels (PD)